There are some different ideas on how to best go about doing this swap. The driver side plugs are easy, the passenger side.... let me first say that a good place is again Install University. The next important thing - IF YOU HAVE A 1998 WITH THE STOCK EXHAUST (headers and y-pipe), YOU CANNOT GET THE #8 PLUG FROM THE BOTTOM. The newer models have the cats in a different location and supposably you can reach the dreaded #8 plug from under the car. THIS DOES NOT WORK ON 1998 CARS. My ass is pretty skinney and there is no way my arm or any tools can get up there.
My advice for this mod, plan an afternoon or 2 short evenings for install time. Start with the driver side because it is relatively easy. If this is your first time passenger side will take some time.
Tools
Plugs (NGK TR-55)
Wires (MSD 8.5)
Socket wrench
Spark plug socket
3" extension (and possible some others)
1" swivel
Antiseize
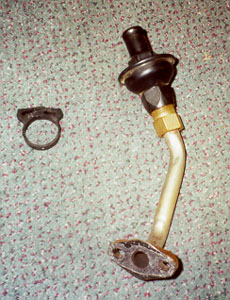
Probably a good idea to have some AIR gaskets (P# 12553617) just in case (I only had to replace 1)
I also disconnected the battery to be safe...
In case you don't know - starting at the front of the car going to the back... driver side plugs are #1, #3, #5, #7. The passenger side plugs again from front to back are #2, #4, #6, #8. I also prefer to leave the STB on - it'll give you something to hold on to later ;-)
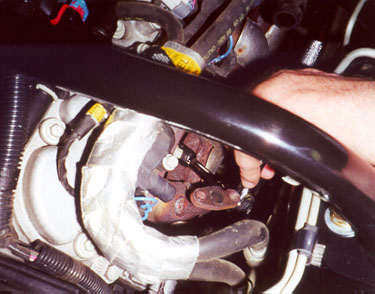
Remove the AIR pipe, in that pic you can see i already have it removed and have a socket on a plug. The AIR pipes have (2) 10mm bolts that hold them on. I took them out and removed the clamp from the tube to the pipe (a small flathead screwdriver helps with the clips) and completely removed the AIR pipe. You can then bend the tube back towards the firewall and out of the way. Start pulling off the old wires. Then start taking out the plugs. Some are easy, if you have trouble (like when you get to the passenger side), put the plug socket on the plug, then put an extension into the socket (if needed), then put your wrench into that. Pull out all the plugs and check them for oil, burn marks, any signs of engine trouble.
Then put the new plugs in. First set the gap (i gapped mine to .052 but your application may be different). Put some anitseize on the plug threads so you'll be able to get them out again some day. Then screw em in, be careful - always start them by hand to make sure you don't cross thread them. Aluminum LS1 block with stripped threads = not good. Plug your new wires on (i did not use any dielectric grease in the boots... i'll find out how hard they are to pull off next time). Put your AIR pipe back on (i believe the torque is 15-foot lbs) and you're all set!
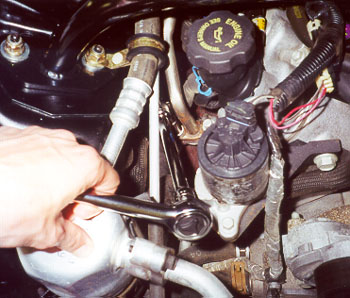
Passenger side is similar - except the plugs are farther back and there is more crap in the way. All i had to do was again remove the AIR pipe (note the swivel and extensions), and remove the #6 and #8 coil packs (on newer cars the coil packs are mounted on a rail and all come off together). The trick to getting the coil pack bolts out is to get a small (3" long) combination wrench and use lots of small turns. Eventually you'll get them out.
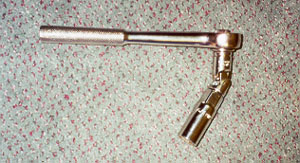
The #6 and #8 plugs are the hardest. Most people complain about #8 but it was #6 that took me the most time. For this side you will need to use some extensions and the swivel. #6 was easy to get the wrench onto - but there was no room to turn it. Eventually i got it out. #8 was pretty easy, use this wrench combo (wrench, 1" swivel, plug socket) and don't forget what i said about putting the socket on the plug, then the swivel in the socket, then put your wrench on it. Also - to reach #8, put your knee up on the battery and hold onto your STB for support. It'll be much easier to reach back in there.
Then put it all back together - new plugs, coil packs, wires, and the AIR pipe. I believe the torque for coil pack bolts is 106-INCH lbs. This is the side i had to replace the AIR pipe gasket, it tore when i removed the pipe.
Take your time, it's really not that bad. But it does take longer to do than the 5 minutes it takes to change plugs on my nissan. After you do it once - it'll take 1/2 the time your next go around.